
Outdoor Speaker Wire: Gauge, Distance & Direct Burial
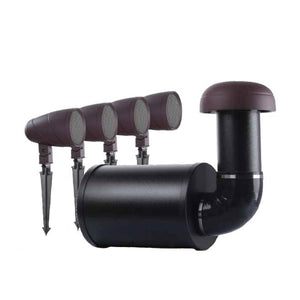

Outdoor speaker wire must suit both the audio system and the route it follows. Gauge alone is not enough: cable that is suitable indoors is not automatically suitable for exposure outdoors or direct burial. Start with the speaker and amplifier instructions before choosing a spool.
Identify what the cable carries
In an amplifier-fed landscape audio system, speaker cable carries amplified audio to the speakers. In a Bluetooth landscape speaker system, the audio may arrive wirelessly while a separate cable supplies electrical power. These are different circuits with different sizing requirements.
For example, Sound by Vista SBV-10-4 uses speaker connections from an amplifier. The LumienVIBE LV-40W-A uses Bluetooth audio with low-voltage power. Do not apply a speaker-wire chart to a transformer-fed power circuit or connect passive audio speakers directly to a lighting transformer.
Choose cable rated for the entire route
List where the cable will run: indoors, exposed outdoors, in conduit or underground. Select cable with the ratings required for each part of that route. A jacket described only as “outdoor” should not be assumed suitable for direct burial; check the manufacturer’s marking and documentation.
For the SBV-10-4, Vista specifies stranded two- or four-conductor direct-burial speaker cable. Conductor count must match the wiring plan. Two conductors and four conductors are not interchangeable descriptions of wire thickness.
Match gauge to distance and equipment
Measure the planned cable route, including detours and the service length needed at connections. A lower AWG number represents a larger conductor. Longer routes generally require closer attention to resistance, but the correct size also depends on the equipment and wiring arrangement.
Use the run-length guidance for the exact system. Avoid treating one manufacturer’s distance table as a universal chart for every speaker, impedance or amplifier. If your proposed layout exceeds the documented limits, resolve the design before ordering cable.
Keep polarity and channels consistent
For wired audio, maintain the specified positive and negative connections. Vista’s wiring guidance warns that reversed polarity can reduce bass. Label the cable ends and preserve left/right channel identification throughout the installation.
Follow the terminal labels and wiring diagram supplied with your unit. Vista documents from different revisions show different subwoofer lead colors; color alone is not a reliable substitute for the correct model documentation. Do not improvise a series or parallel connection to add more speakers.
Protect connections and test before burial
Disconnect power before wiring. Keep stray strands from bridging terminals. Use the manufacturer-specified outdoor connections and follow their conductor-size and installation instructions. Vista specifies the waterproof wire nuts supplied with its speakers.
Test every speaker before final backfilling. If one area sounds weak, inspect polarity, connections and channel assignment with power disconnected before simply raising the volume. Keep a cable-route sketch and label the equipment ends for future troubleshooting.
Build the wiring plan around the system
Browse outdoor speakers and audio systems to identify the equipment first. Then choose cable and connections that meet that system’s instructions. A landscape lighting cable’s gauge does not, by itself, establish that it is the correct speaker cable.
Related Outdoor Audio Guides
Start with our backyard speaker planning guide to map the listening areas and cable routes. If you are still comparing systems, read Bluetooth vs. wired landscape speakers before choosing your cable.
Installing the Vista system? Follow our Sound by Vista SBV-10-4 installation and setup guide for component planning and manufacturer-specific checks.
- Jenny Branch