
How to Hang Outdoor String Lights: Layout, Supports & Power
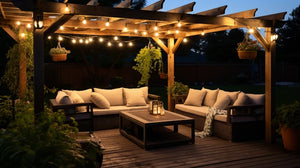

To hang outdoor string lights, first measure the route and identify suitable structural supports. Then match the string, bulbs and power source, install the specified suspension hardware, and check the complete system before energizing it. Choosing a longer strand does not solve an unsupported span or an overloaded feed.
This guide helps you plan bistro lighting for a patio, deck or pergola. New electrical work and pool-area installations need a qualified electrician and any required local approval.
1. Sketch the layout before choosing a kit
Mark the seating area, doors, steps, power source and possible supports. A perimeter layout frames an area; a V uses two spans; a zigzag carries lights across a wider space. Put changes of direction at supports that can carry the actual load. A decorative fence post, gutter or adhesive hook is not automatically a suitable anchor.

Measure every segment and include the unlit route from the power source, connection allowances and the drape specified for the installation. A 12-by-16-foot rectangle has a 56-foot straight perimeter before those allowances. A 48-foot set will not surround it, and pulling its cord tight will not make it a suitable substitute.
2. Choose 12V or 120V as a complete system
| Option | What it offers | Plan before ordering |
|---|---|---|
| Brilliance 12V kits | 26, 50, 98 or 150-foot string with hanging hardware | Separate lamps, connectors and suitable transformer |
| Brilliance 12V reel | 328-foot supply of cuttable string for custom sections | Permitted electrical runs, feeds, lamps and suspension hardware |
| Brilliance 120V kit | 48-foot plug-in string with 24 lamps | Outdoor power, supports and connected-kit limit |
For a smaller low-voltage layout, compare the 26-foot kit and 50-foot kit. A 48-foot 120V kit uses a different power arrangement. Never connect a 12V lamp or string directly to household 120V.
3. Specify supports and mounting cable
Check the manufacturer's mounting instructions, the distance between supports, outdoor exposure and the strength of each anchor. Where a support cable is required, it carries the suspension load; the electrical cord should not serve as an improvised tension cable. Do not pierce the cable with screws or staples.

Plan height at the lowest point of the drape, not just at the hooks. Account for doors, people, maintenance access and nearby structures. There is no single hanging height that makes every installation suitable. Keep pool and spa routes out of this ordinary patio layout until their separate clearance requirements have been checked.
4. Choose lamps and check the electrical run
Count sockets, choose lamp output and calculate the actual connected load. Check both maximum length and lamp count. Brilliance's 12V limits change with bulb wattage; its 120V kit permits up to four kits connected together. See our bulb and maximum-run guide before selecting a long string or transformer.
Check dimming as a combination of lamp, control, supply and load. A dimmable lamp does not guarantee every transformer or wall dimmer will work well with it.
5. Assemble with the power disconnected
Follow the exact set's assembly sequence. Use the intended cable entry parts, seals and end terminations. Have the outdoor supply, required GFCI protection and any new circuit work installed or checked by a qualified electrician. Do not cut a preassembled string unless its manufacturer expressly allows it; the cuttable Brilliance low-voltage reel and the 120V kit are different products.
6. Check the layout at night and maintain it
Evaluate brightness from seated eye level and from neighboring areas. Decorative bistro light may need separate step or task lighting; our pergola lighting guide helps plan those uses. Look for glare before filling the entire space with brighter lamps.
Inspect supports, insulation, seals and lamp connections periodically and after severe weather. Disconnect damaged equipment and correct the problem before reuse. Keep the part number and installation instructions for future replacement bulbs.
Manufacturer references
Brilliance 12V kit and connector guide (PDF) · Brilliance 120V kit instructions
Continue planning your project
- Bistro Light Bulbs & Maximum Run Length: 12V vs. 120V
- Custom-Cut Bistro String Lights: Reels, Connectors & Planning
- String Lights Near Pools: Safety, Clearances & NEC Planning
Shop bistro lights, kits and connectors · Compare S14 LED bulbs
- Jenny Branch