
How to Install a SMRT Logic Controller for Your Landscape Lighting System


Let there be light! That's probably what you're saying to yourself as you contemplate the dark expanse of your backyard or garden. Perhaps you've recently invested in a landscape lighting system, hoping to make your outdoor space a nighttime oasis of relaxation and tranquility. But the question remains: how to set up and manage all of these lights?
Meet the SMRT Logic controller, formerly known as the LPLUS controller, and its companion unit, the LPCU-A. This dynamic duo makes managing your landscape lighting system as easy as flipping a switch. However, the process of installing and setting up these units can be a bit tricky. That's where this guide comes in. Let's dive in!
Table of Contents
- Understanding Landscape Lighting
- Why Choose SMRT Logic Controller?
- Essential Components for Installation
- Step-by-Step Installation Guide
- Connect Hardware
- Register
- Add Location
- Add Scene
- The Addition of SMRT-T and LPCU-A Units
- FAQ
- Conclusion
Understanding Landscape Lighting
Why Choose SMRT Logic Controller?
SMRT Logic is not your ordinary lighting controller. It's a state-of-the-art system that gives you unprecedented control over your landscape lighting. With it, you can customize your lighting scenes, set timers, and even control your lights from your smartphone or tablet. Talk about a bright idea!
Essential Components for Installation
SMRT-T (Formerly LPLUS Controller)
The SMRT-T, previously known as the LPLUS controller, is the brains of the operation. It's the device that controls your lights and communicates with your smart devices. This controller is all about giving you the power to create the perfect ambiance in your outdoor space.
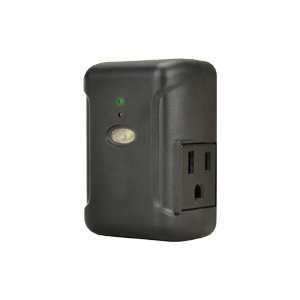
LPCU-A
The LPCU-A is the workhorse of the SMRT Logic system. This unit receives commands from the SMRT-T controller and turns your lights on and off. It also allows for dimming control, giving you the ability to set the perfect mood for any occasion. This unit plugs directly into your transformer or wall outlet.
Step-by-Step Installation Guide
Connect Hardware

Connecting the hardware is the first major step towards illuminating your outdoor space. But don't fret; it's a walk in the park. Simply connect the SMRT-T controller to your internet router using the supplied Ethernet cable. Once connected, plug the power adapter into a standard electrical outlet and connect it to the SMRT-T controller.
Register

Next on our to-do list is registration. Visit the SMRT Logic website and create a new account. This is a straightforward process, and you only need to provide some basic information. With registration complete, you'll have access to your very own SMRT Logic dashboard, from where you can control your lighting system.
Add Location

With the hardware connected and your account registered, it's time to add your location. From the dashboard, click on the "Add Location" button and follow the prompts. Here, you'll provide the physical location of your lights, which will help the SMRT Logic system coordinate your lighting scenes.
Add Scene

Once your location is set, it's time to add some scenes. A scene is a preset lighting arrangement that you can activate with a single click. For example, you might have a "party" scene that illuminates your entire yard, or a "romantic" scene that lights up only the cozy corners.
The Addition of SMRT-T and LPCU-A Units
Adding the SMRT-T controller and the LPCU-A units to your system is the final step in the installation process. This involves syncing these devices with your SMRT Logic account. Once this is done, you'll be able to control all of your lights from your smartphone or tablet. It's like having a light switch in your pocket!
FAQ
-
What is a SMRT Logic Controller?
- A SMRT Logic Controller is a device that allows you to control your landscape lighting system. It connects to your internet router and syncs with your smart devices, giving you the ability to control your lights from anywhere.
-
What is an LPCU-A?
- The LPCU-A is a unit that works in tandem with the SMRT Logic Controller. It receives commands from the controller and turns your lights on and off.
-
How do I connect the hardware?
- Connect the SMRT-T controller to your internet router using the supplied Ethernet cable. Then, plug the power adapter into an electrical outlet and connect it to the controller.
-
How do I register?
- Visit the SMRT Logic website and create a new account. After registration, you'll have access to a dashboard where you can control your lighting system.
-
What is a scene?
- A scene is a preset lighting arrangement that you can activate with a single click. You can create multiple scenes for different occasions.
-
How do I add the SMRT-T and LPCU-A units?
- Adding these units involves syncing them with your SMRT Logic account. Once linked, you can control all your lights from your smart devices.
Conclusion
Installing a SMRT Logic controller for your landscape lighting system might sound like a challenging task, but with the right guide (and a little bit of patience), you can easily navigate the process. By following the steps outlined in this guide, you'll be on your way to a well-lit and beautifully controlled landscape lighting system. Here's to many nights of perfect outdoor ambiance!
- Kevin Simon