Illuminating Your Landscape with WAC 5011: How to Adjust Lumens and Beam Spread

If you want to enhance the beauty of your outdoor space, then you should consider adding some lighting fixtures to it. The WAC 5011 outdoor landscape lighting fixture is one of the best options available in the market that can help you illuminate your landscape like never before. With this fixture, you can not only light up your trees and architectural structures, but you can also adjust the lumens and beam spread to achieve the perfect lighting effect.
In this article, we will guide you through the process of adjusting the lumens and beam spread on the WAC 5011 outdoor landscape lighting fixture. We will also provide you with a definition of lumens and beam spread and explain how the WAC 5011 is used to light up your outdoor space. So, let's get started!
Definition of Lumens and Beam Spread:

Before we dive into the details of adjusting lumens and beam spread on the WAC 5011, let's first understand what these terms mean.
Lumens are the measurement of the total amount of visible light emitted by a lighting fixture. The higher the lumens, the brighter the light. Lumens are usually indicated on the packaging of the lighting fixture or on the product specifications.
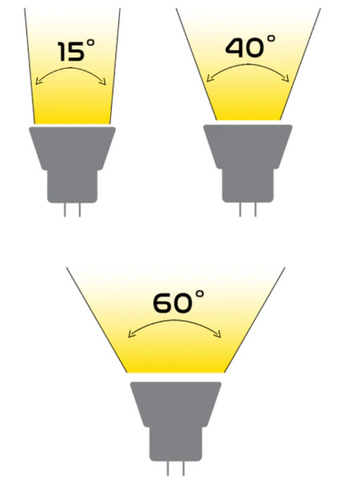
Beam spread refers to the angle of the light that is emitted from the fixture. A narrow beam spread will provide more focused and intense light, while a wider beam spread will distribute light more evenly over a larger area. The beam spread is usually measured in degrees.
Now that you have a basic understanding of lumens and beam spread, let's move on to adjusting these on the WAC 5011 outdoor landscape lighting fixture.
How to Adjust the Lumens and Beam Spread on the WAC 5011 Outdoor Landscape Lighting Fixture:
Step 1: Locate the adjustment screw
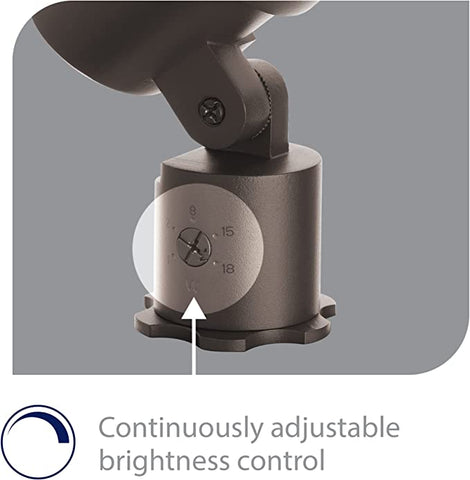
The WAC 5011 outdoor landscape lighting fixture comes with one adjustment screw for adjusting the lumens. You can find the beam spread adjustment on the cowl of the fixture. The control for lumens is on the base of the fixture and can be easily accessed after installation.

Step 2: Adjust the lumens
To adjust the lumens, you need to turn the lumens adjustment screw clockwise to increase the brightness or counterclockwise to decrease it. It is recommended to start with a low brightness and gradually increase it until you achieve the desired level.
Step 3: Adjust the beam spread
To adjust the beam spread, you need to turn the beam spread adjustment ring clockwise to narrow the beam spread or counterclockwise to widen it. Again, it is recommended to start with a narrow beam spread and gradually widen it until you achieve the desired lighting effect.

Step 4: Test the lighting effect
After adjusting the lumens and beam spread, it is important to test the lighting effect to ensure that it is appropriate for your outdoor space. Walk around your landscape and check if the lighting is evenly distributed and if the brightness is appropriate for the area.
FAQs About Adjusting Lumens and Beam Spread:
Q: Can I adjust the lumens and beam spread separately on the WAC 5011 outdoor landscape lighting fixture?
A: Yes, the WAC 5011 outdoor landscape lighting fixture comes with separate adjustments for lumens and beam spread, allowing you to adjust them independently.
Q: How many lumens can the WAC 5011 outdoor landscape lighting fixture produce?
A: The maximum number of lumens that the WAC 5011 outdoor landscape lighting fixture can produce between 50-1150 lumens.
The WAC 5011 outdoor landscape lighting fixture is an excellent choice for illuminating your outdoor space. By adjusting the lumens and beam spread, you can achieve the perfect lighting effect for your architectural structures and trees. Remember to start with low brightness and narrow beam spread and gradually increase them until you achieve the desired effect. With a little bit of experimentation, you can create a beautiful and well-lit outdoor space that you can enjoy day and night.
- Jenny Branch
